Email remains one of the most reliable tools for personal and professional communication. CenturyLink provides a trusted email service that many users prefer for its stability and simplicity. However, convenience improves greatly when accounts sync directly with mobile devices. Setting up CenturyLink email on iPhone and Android ensures that messages arrive instantly, without requiring repeated logins through a browser. Although configuration may seem technical, following the correct process makes it straightforward and secure.
Why Configure CenturyLink Email on Mobile Devices
Carrying email on a smartphone creates flexibility and responsiveness. Messages reach you in real time, allowing quick replies from any location. Calendar integration and contact syncing simplify communication across platforms. For professionals, managing CenturyLink email on iPhone or Android reduces missed messages and enhances productivity. For personal use, it ensures family, friends, and services remain accessible without delays.
Information Required Before Setup
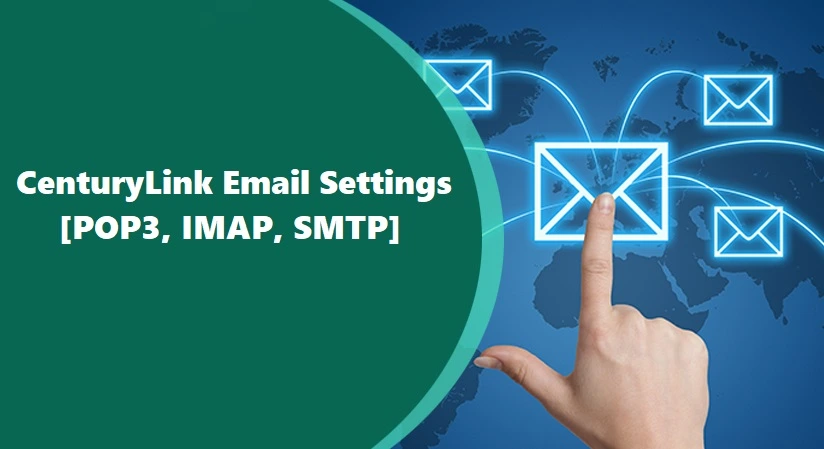
Configuration begins with preparation. CenturyLink email requires specific server details to function on mobile devices. Users need the full email address, associated password, and incoming and outgoing server information. For incoming mail, imap.centurylink.net or pop.centurylink.net applies, depending on preference. Outgoing mail uses smtp.centurylink.net. IMAP is often preferred since it synchronizes messages across devices, while POP downloads them to one device. Gathering this information ensures a smooth setup process.
Configuring CenturyLink Email on iPhone
On iPhone, email accounts connect through the built-in Mail app. Open the settings menu, select the option for accounts, and choose to add a new account. Scroll to the “Other” section because CenturyLink is not listed among default providers. Enter your name, full CenturyLink email address, password, and a descriptive label for the account.
After entering these details, the phone asks whether you prefer IMAP or POP. Selecting IMAP allows emails to remain synced across your iPhone and other devices. Enter the incoming server as imap.centurylink.net with port 993 and SSL enabled. For POP, use pop.centurylink.net with port 995 and SSL enabled. Outgoing mail requires smtp.centurylink.net with port 587 and TLS or SSL. Authentication must remain active, using the same email address and password. Once complete, tap save, and the Mail app tests the connection. If no errors appear, the account becomes active, and messages begin syncing.
Configuring CenturyLink Email on Android
Android devices vary depending on manufacturer, but the process follows a similar path. Open the settings menu, locate accounts, and select to add an email account. Choose “Other” when prompted for account type. Enter your full CenturyLink email address and password.
The system asks to configure either IMAP or POP. For IMAP, input imap.centurylink.net with port 993 and SSL enabled. For POP, input pop.centurylink.net with port 995 and SSL enabled. Outgoing server configuration requires smtp.centurylink.net with port 587 and TLS. Ensure that authentication remains enabled, using the same email credentials. After saving, Android tests the connection, and if successful, your CenturyLink email becomes available through the default mail app or Gmail app.
Read Also: Step-by-Step Guide to Setting Up CenturyLink Email on Outlook
Synchronizing Folders and Settings
After successful setup, you may want to adjust synchronization settings. On iPhone, navigate to account details in settings and choose how many days of mail to sync. On Android, open the account settings within the mail app to adjust sync frequency, folder preferences, and notification options. IMAP ensures all folders appear as they do on webmail, while POP may limit visibility to the inbox. Proper configuration helps organize messages and reduces missed emails.
Troubleshooting Common Problems
Sometimes issues arise during setup. Authentication errors usually result from incorrect usernames or passwords. Verify that you are entering your full CenturyLink email address, not just the username. Connection failures may point to incorrect port numbers or encryption settings. If outgoing mail fails to send, confirm that SMTP authentication is enabled. Delays in receiving messages often come from sync settings set to manual instead of automatic. Updating iOS or Android software can also resolve compatibility issues.
Ensuring Security During Configuration
Security should never be overlooked when setting up email on a mobile device. Always enable SSL or TLS encryption during configuration to protect data during transmission. Use a strong, unique password that combines uppercase, lowercase, numbers, and symbols. Avoid public Wi-Fi when first adding your account, since unsecured networks increase the risk of exposure. If available, enable two-factor authentication for your CenturyLink account to add another layer of protection.
Advantages of Using IMAP for Mobile Access
While both IMAP and POP are supported, IMAP usually provides a better experience for mobile users. IMAP keeps all folders synchronized across devices, so messages marked as read on one device show the same status everywhere. Deleted emails disappear from all devices, maintaining consistency. POP, on the other hand, downloads messages to one device, which may cause confusion if you switch between multiple devices. Choosing IMAP simplifies management and ensures reliability.
Importance of Regular Updates
Both iPhone and Android receive regular updates that improve email functionality and security. Running outdated software may cause errors during login or prevent certain security protocols from functioning. Enable automatic updates for both operating systems to keep your device compatible with CenturyLink servers. Updated software also enhances performance and stability, making the overall experience smoother.
Maintaining Reliable Access
After setup, monitor your account periodically. Review synchronization settings to ensure important folders remain updated. Update your password regularly and confirm recovery information such as backup email addresses or phone numbers. If you switch devices, repeat the configuration process to maintain access. Taking small steps to manage your account prevents unexpected lockouts and ensures seamless communication.
Conclusion
Configuring CenturyLink email on iPhone and Android may seem challenging, but the process becomes simple once you know the required settings. With accurate server information, correct port numbers, and secure authentication, your account integrates smoothly into mobile devices. Whether you choose IMAP for synchronization or POP for local storage, mobile access guarantees flexibility and reliability. By keeping devices updated, enabling encryption, and practicing good security habits, you ensure that CenturyLink email remains safe and accessible wherever you go.
FAQs
How do I set up CenturyLink email on iPhone?
Go to Mail settings, add an account, choose “Other,” then enter CenturyLink email, password, and server details.
How do I configure CenturyLink email on Android?
Open settings, add an email account, select “Other,” then enter CenturyLink email, password, and IMAP or POP server details.
What are CenturyLink IMAP settings for mobile?
Use imap.centurylink.net, port 993, with SSL enabled for incoming mail.
What are CenturyLink SMTP settings for outgoing mail?
Use smtp.centurylink.net, port 587, with TLS or SSL and authentication enabled.
Should I choose IMAP or POP for CenturyLink mobile setup?
IMAP is recommended because it syncs emails across devices, while POP stores them only on one device.